
While Memfault provides a user-friendly web interface that is consistent across various devices, there can be challenges in setting up the actual embedded system and ensuring the proper functioning of all services. However, with the assistance of Memfault's helpful integration guides and Linux SDK, the required customization is kept to a minimum.
In this article, we will showcase our attempt to integrate Memfault services into a PHYTEC phyBOARD-Polis i.MX 8M Mini (phyCORE i.MX8M Mini SoM) system using Yocto build system.
Getting the basic Memfault services up and running
Our starting point was PHYTEC’s
Yocto BSP, which is necessary to get a customized Linux image running on the
system. We then followed
Memfault’s Linux Integration Guide, and added
meta-memfault
and
meta-rust-bin
meta-layers, which are part of the
Memfault Linux SDK. Next, we proceeded to create our own meta-layer called
meta-norik-memfault, which we based off of
meta-memfault-example. We were able to reuse Memfault’s recipes-devtools,
recipes-extended and
recipes-memfault recipes. We created our own
base-image.bb by starting with the
phytec-headless-image and adding additional components:
IMAGE_INSTALL += "memfault-device-info"
	PACKAGECONFIG:pn_memfaultd := "collectd coredump logging"
We then had to append to memfaultd.conf with
memfaultd.bbappend
recipe:
persist_dir: "/"
	tmp_dir: "/"
as this image does not have an extra persistent partition by default and we weren’t setting up OTA updates just yet.
Before building our image, we had to set some variables in our
local.conf:
LICENSE_FLAGS_ACCEPTED:append = " commercial_memfaultd"
	MEMFAULT_DEVICE_ID = "phytec_polis_1"
	MEMFAULT_BASE_URL = "https://device.memfault.com"
	MEMFAULT_PROJECT_KEY = <project_key>
	MEMFAULT_SOFTWARE_TYPE = "main"
	MEMFAULT_SOFTWARE_VERSION = "1.0.0"
	MEMFAULT_HARDWARE_VERSION = "A2"
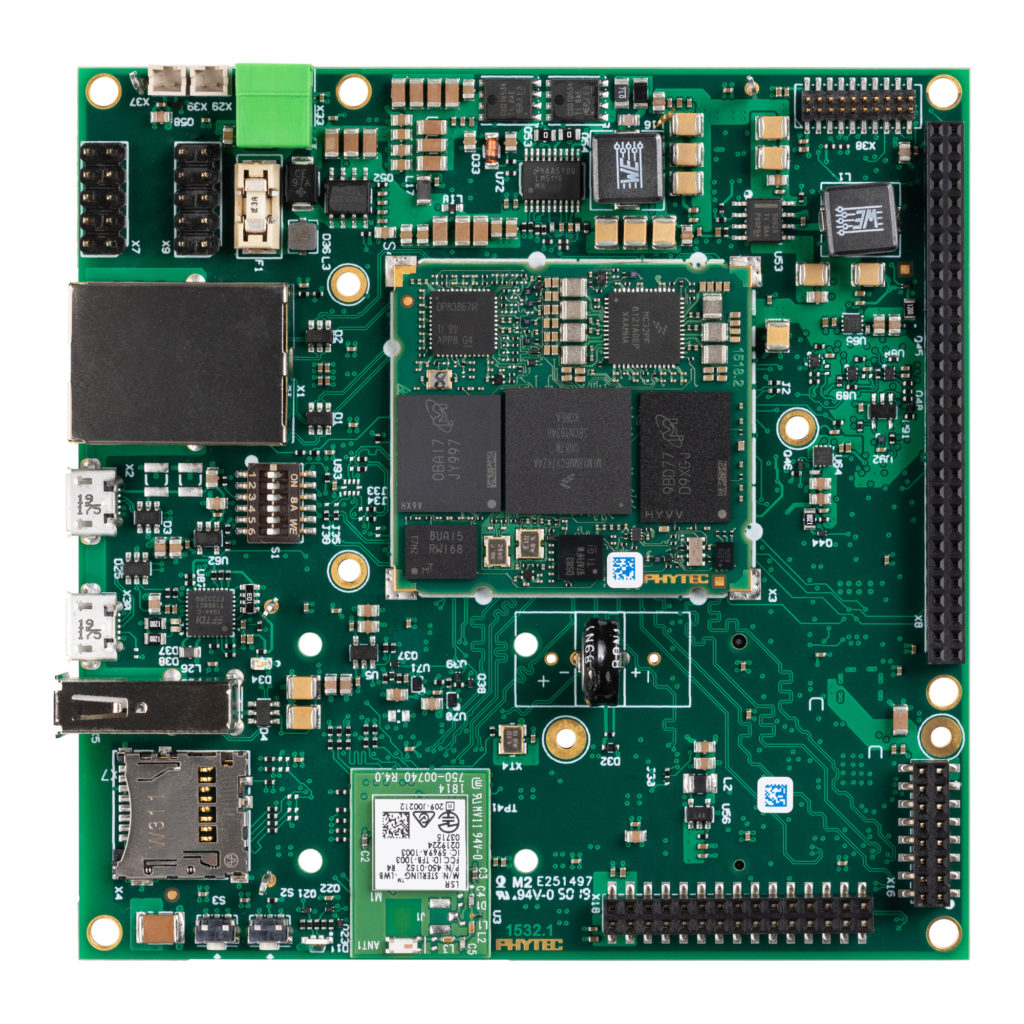
The development board we were targeting was the
PHYTEC phyBOARD-Polis i.MX8M Mini
PB-02820-001.A2, hence the hardware revision “A2”.
Our distro of choice was “ampliphy-vendor”.
And that was all. We now have a buildable image that is ready for testing.
Adding Memfault’s OTA updates capability
After confirming that all Memfault services, except OTA updates, are functioning correctly, we proceeded to integrate SWUpdate. By default, PHYTEC's BSP utilizes RAUC for OTA updates, but we chose to follow Memfault's guide and use SWUpdate instead.d adding additional components
We began by adding the
meta-swupdate
layer to our Yocto setup and copying over
recipes-support
from
meta-memfault-example
into our layer. The recipes required no modification.
Next, we had to set up SD-card partitioning. We opted for an A/B partitioning scheme (most common for embedded systems), with the layout depicted in Figure 1.

We’ve created a custom
swupdate-sdimage.wks
script and a machine configuration file in order to modify the PHYTEC
BSP presets. Our custom
machine configuration file
contained the following entries:
WKS_FILES:mx8m-mainline-bsp = "swupdate-sdimage.wks"
	# 1 = SD card, 2 = eMMC
	EMMC_DEV:mx8mm-generic-bsp = "1"

	OTA_PARTITION_A = "mmcblk${EMMC_DEV}p2"
	OTA_PARTITION_B = "mmcblk${EMMC_DEV}p3"
Since we were flashing the image onto an SD-card, we set
EMMC_DEV to 1.
swupdate-sdimage.wks contained the following partitioning
information:
part u-boot --source rawcopy --sourceparams="file=imx-boot" --ondisk mmc --no-table --align ${BOOTLOADER_SEEK}
	# Copy the u-boot environment to the predefined offset 0x3e0000
	part u-boot-env --source rawcopy --sourceparams="file=u-boot-env.bin" --ondisk mmc --no-table --offset 7936s --fixed-size 64k

	part --source bootimg-partition --fstype=vfat --label boot --ondisk mmc --active --align 4096 --size ${WKS_BOOTIMAGESIZE}
	part / --source rootfs --fstype=ext4 --label root_a --ondisk mmc --use-uuid
	part / --source rootfs --fstype=ext4 --label root_b --ondisk mmc --use-uuid
	part /data --fstype=ext4 --label data --ondisk mmc --fixed-size 64

	bootloader --timeout=0
After each software update, SWUpdate writes information about the new
root file system partition to a U-Boot environment variable so that
the system can boot it on the next reboot. To avoid the need to
perform this step through the bootloader, we have decided to include
the boot environment in the image itself. To generate the flashable
u-boot-env.bin, we have created a recipe
u-boot-env.bb
that invokes the U-Boot tool mkenvimage as part of the
system image build process.
Next, we had to adapt the SWUpdate configuration files. On PHYTEC’s
BSP, the number of the root partition is stored in the environment
variable mmcroot, and the generated rootfs archives are
to be flashed at location / (root). This is reflected in
the modifications to Memfault’s default
sw-description.in:
images: (
											{
													filename = "base-image-__MACHINE.tar.gz";
													type = "archive";
													compressed = "zlib";
													device = "/dev/__OTA_PARTITION_A";
													filesystem = "ext4";
													path = "/";
											}
									);
									uboot: (
											{
													name = "mmcroot";
													value = "2";
											}
									);
As a final step, we had to create a
base-files_%.bbappend
in which we appended /etc/fstab to mount the persistent
/data partition:
do_install:append () {
			# Mount the persistent storgae used by Memfault
			echo "/dev/mmcblk${EMMC_DEV}p4  /data ext4  defaults  0  0" >> ${D}${sysconfdir}/fstab
	}
Performance monitoring & metrics
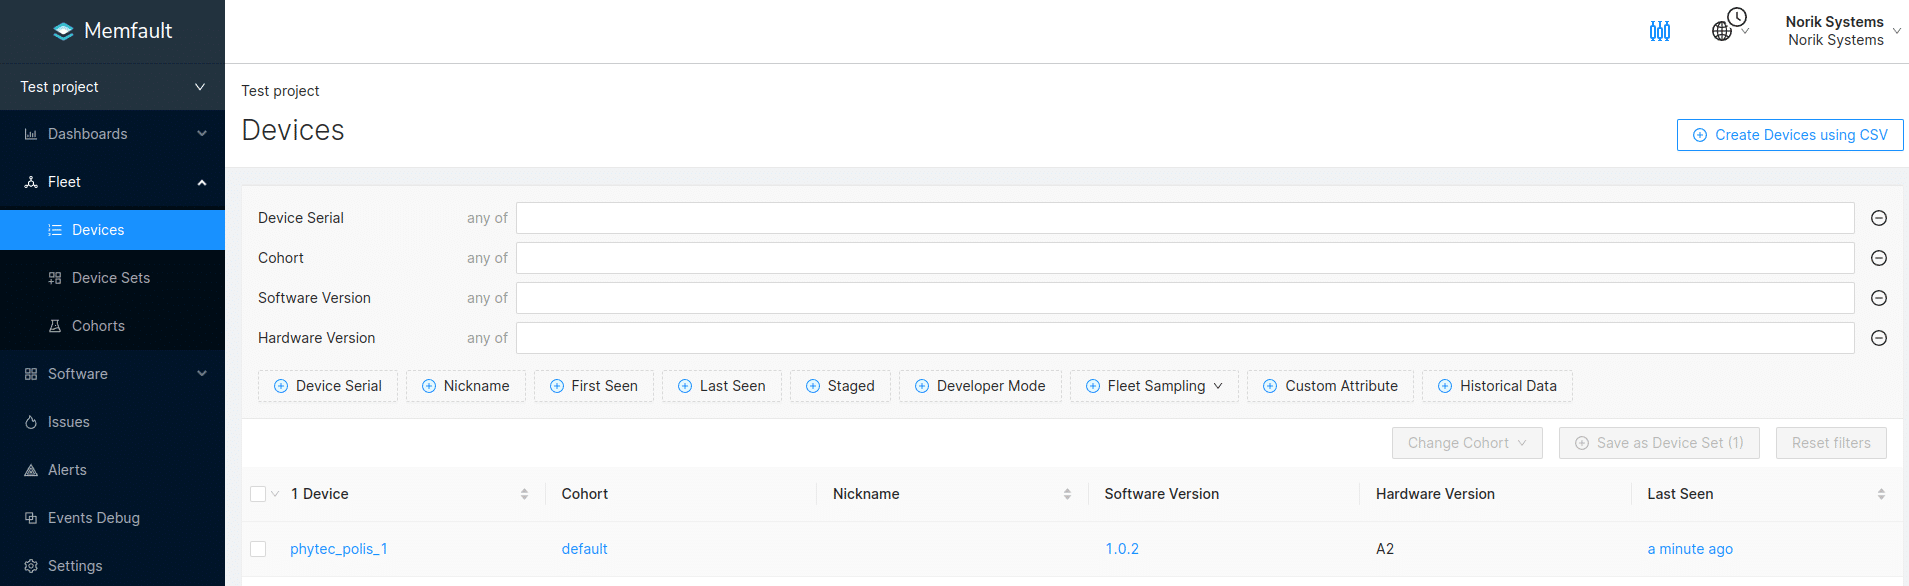
With Memfault one can monitor performance and metrics for a specific device or for a fleet of devices. To see performance details for a specific device, go to: Fleet →Devices and select a device.
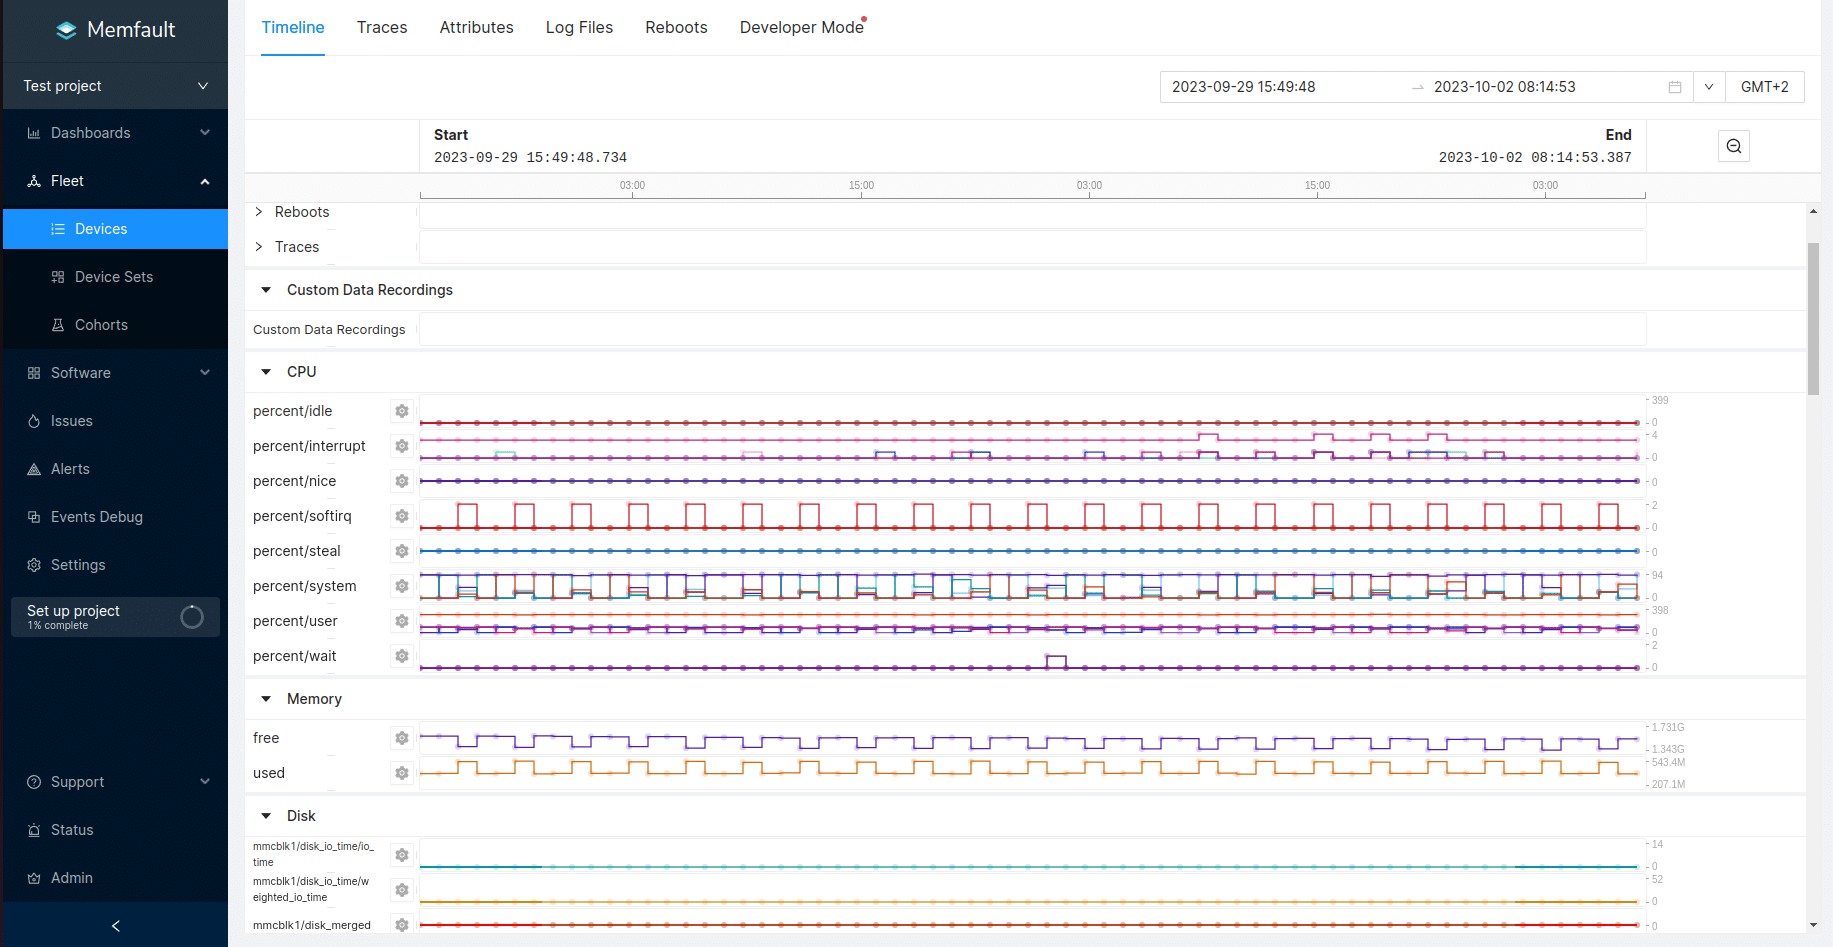
In Timeline tab we can observe multiple performance parameters of the device between two points in time.
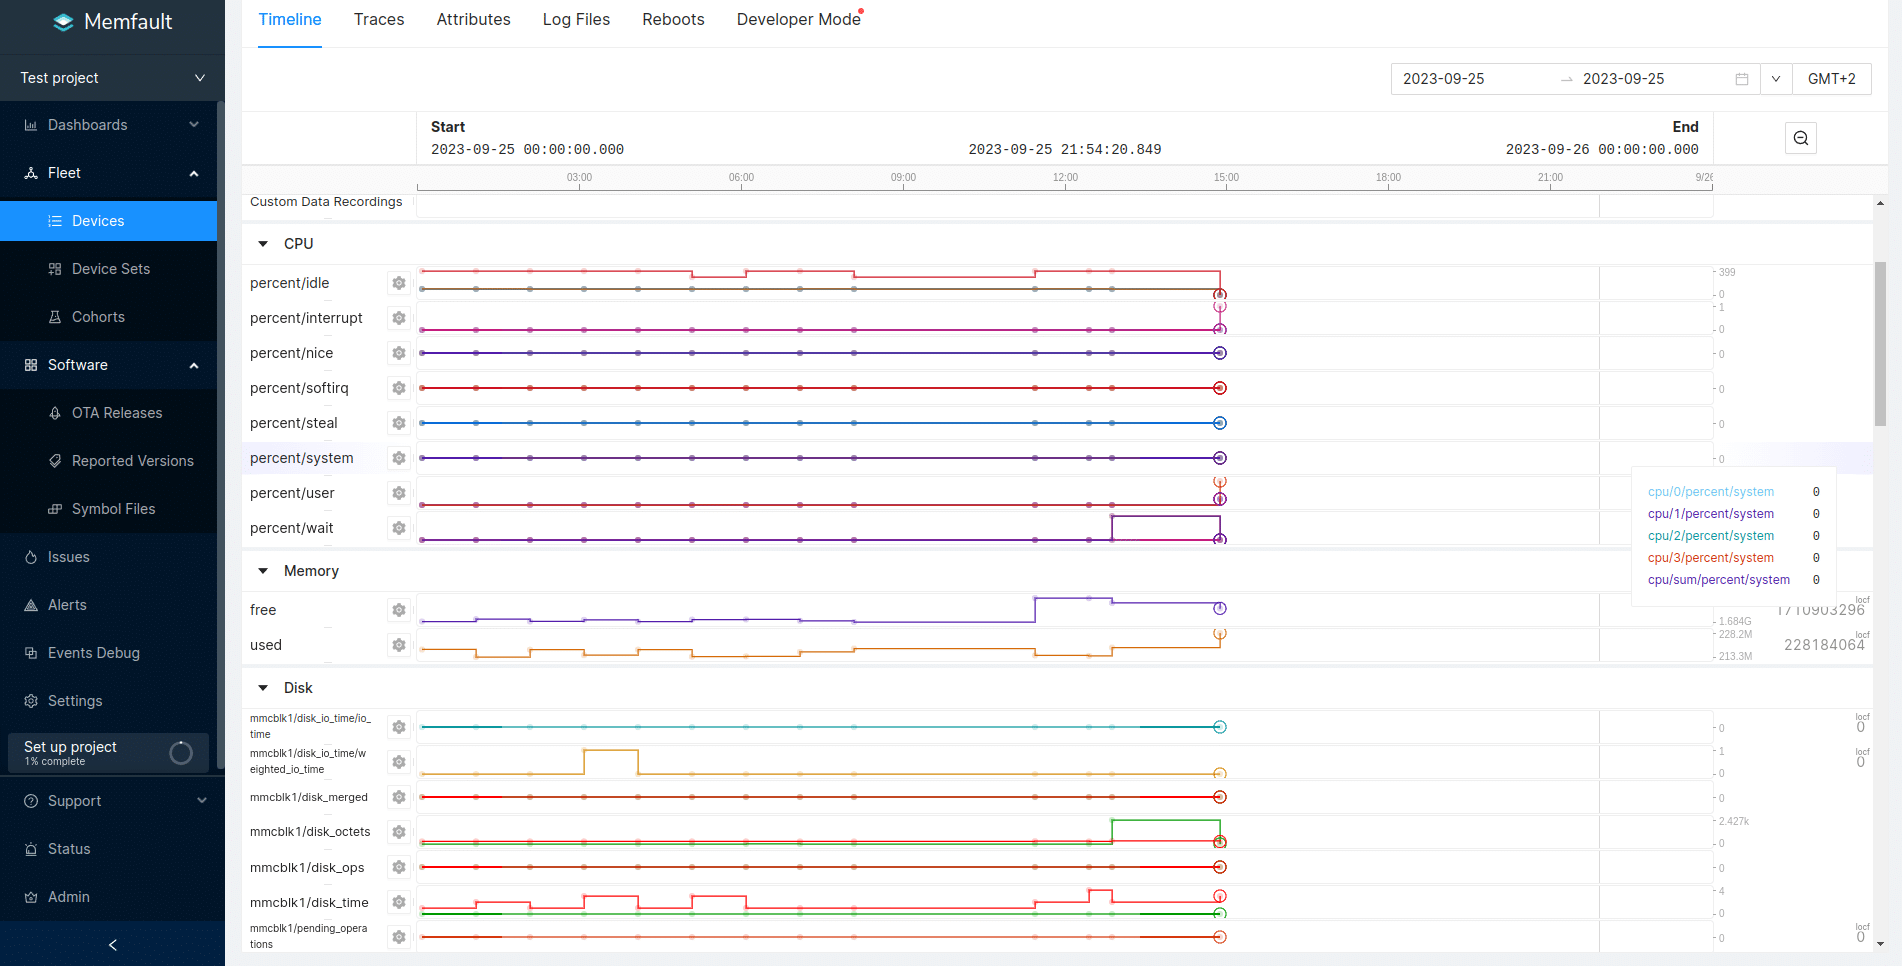
To test how performance is shown on the charts, we created a script
that stressed the system for 30 minutes every 2 hours (using
cron), and left it running for two days. Stress test
results are shown in the image below. Memfault can thus be used for
the detailed performance monitoring of a device.
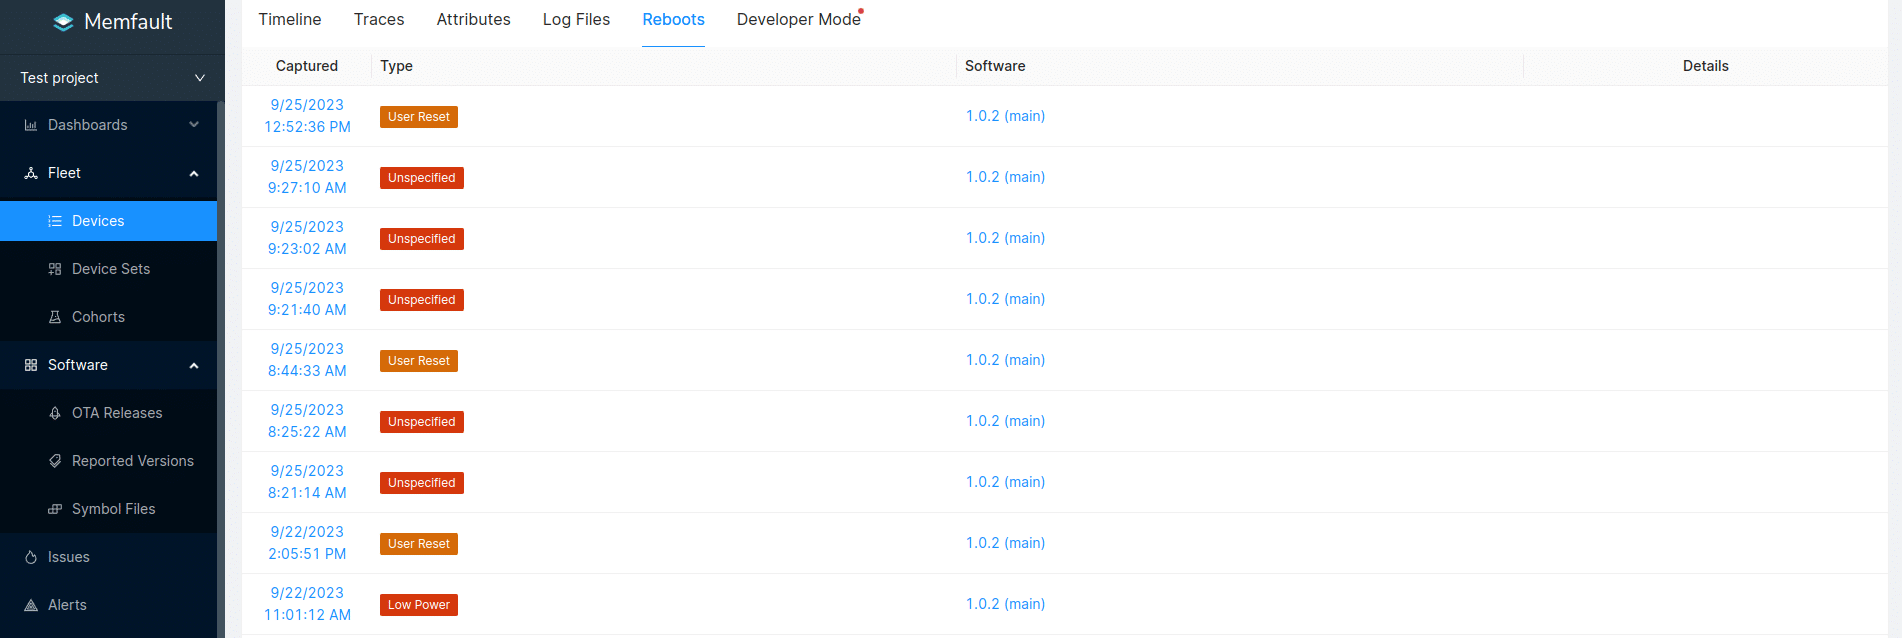
In the Reboots tab, we can also observe when device reboots occurred, type (cause) of the reboot and software version currently running on the device.
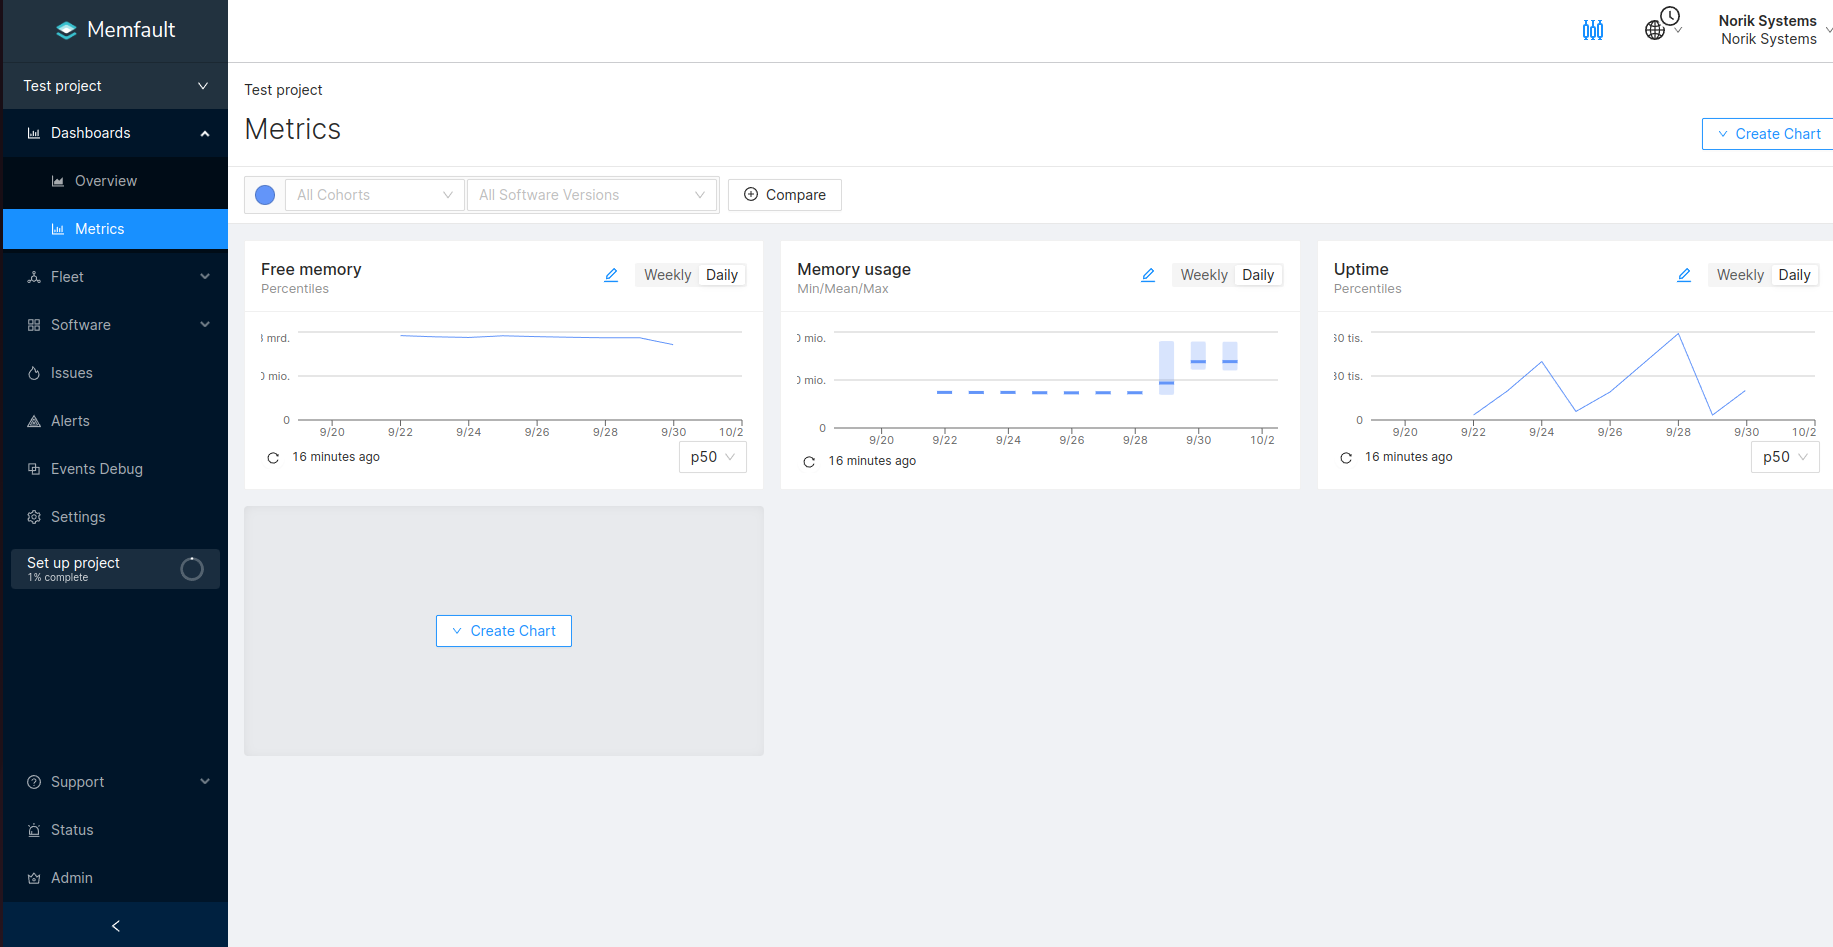
We can also monitor performance for entire device fleet using metrics, located under Dashboards→Metrics. Here we can add charts for Metrics and Issues for the fleet. We can choose from 7 different types of aggregations (Precentiles, Min/Mean/Max, Sum, etc.) and 2 Rollup types (Over time, By Cohort version or Software version).
Using these charts one can easily compare performance of different versions of device software. For easier comparisons Memfault can normalize values by calculating a value per 1000 devices. This is useful for comparing device sets of different sizes.
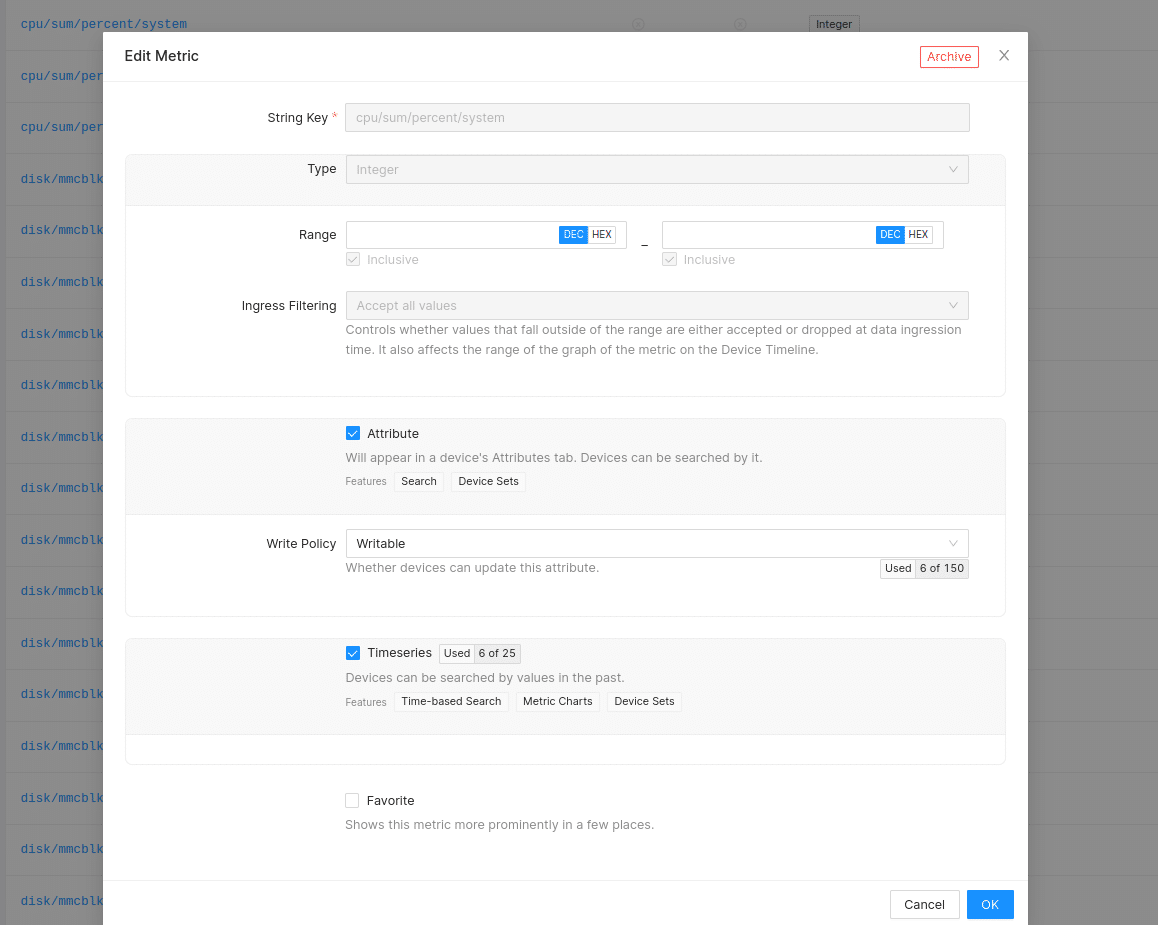
If we want to add a specific system metric that we would like to observe, we needs to configure it as attribute and timeseries. This can be done by going to Settings→Metrics. A list of metrics will appear where we can choose a specific metric to add as an attribute and timeseries. I.e. for CPU percent system sum:
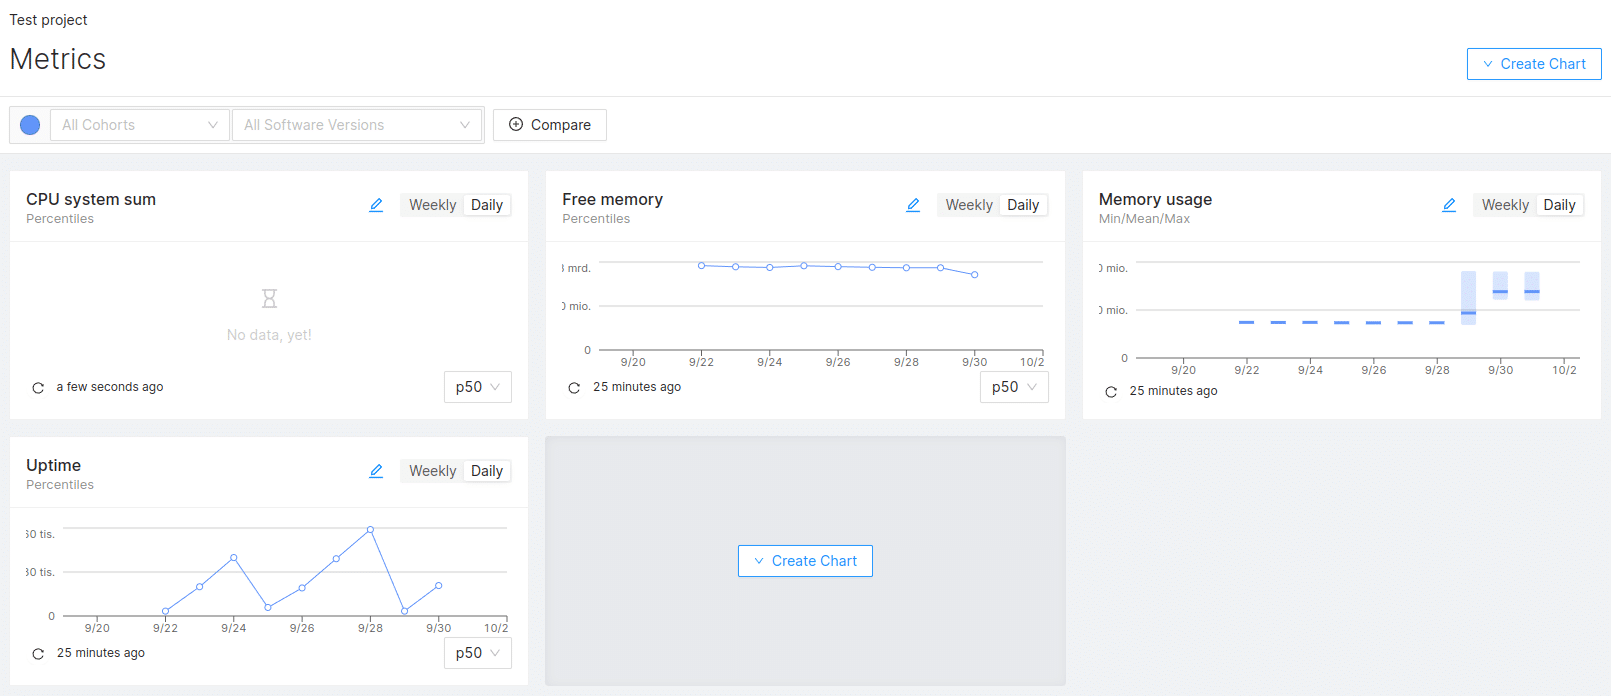
We can now add a new chart in Metrics tab shown previously. Chart will be updated when new data is available.
Additionally, application-specific metrics, such as battery life, connectivity, and flash usage, can be effectively monitored by enabling them within the application code.
Crash Analytics
Devices in a fleet can upload diagnostics data to Memfault which analyzes the data. Detected problems are converted into Traces, similar Traces are then grouped into an Issue.
To use this, coredump support needs to be enabled. We
must build Linux kernel with the following options enabled:
CONFIG_COREDUMP=y
-
CONFIG_CORE_DUMP_DEFAULT_ELF_HEADERS=y
Configure Yocto to generate an image with
DEBUGFS support:
# Support memfault-cli upload-yocto-symbols command
	DEPENDS:append = " elfutils-native"
	IMAGE_GEN_DEBUGFS = "1"
	IMAGE_FSTYPES_DEBUGFS = "tar.bz2"
Test the integration with memfaultctl using
trigger-coredump command:
# memfaultctl trigger-coredump
Force memfaultd to sync data immediately (if developer
mode is not active).
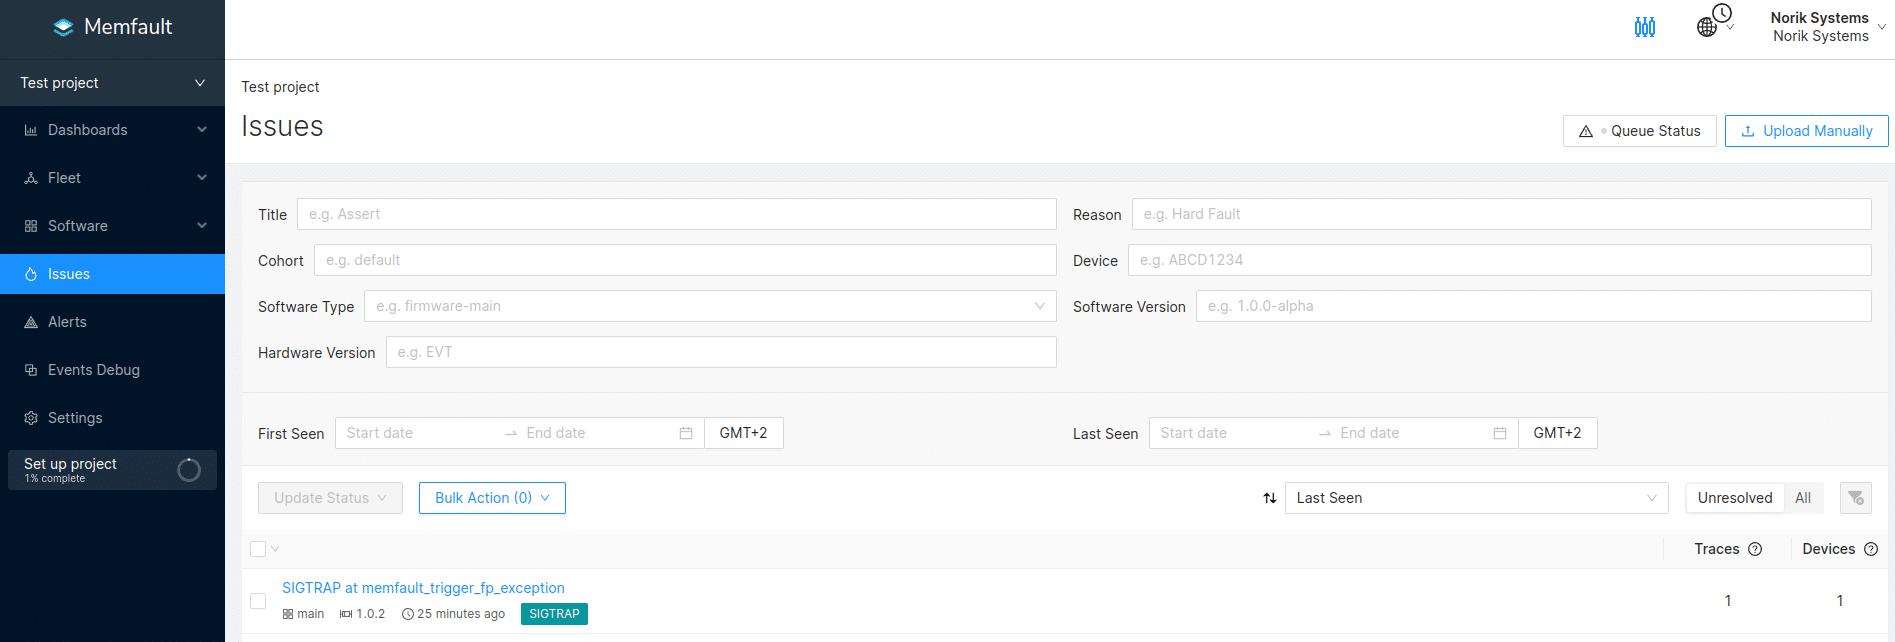
# memfaultctl syncIf the integration is set up correctly and data collection is enabled, a new issue will appear in the project’s Issues page:
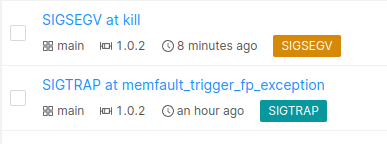
For example, one can create another “test” issue with the following line:
# kill -SEGV $$Like expected, this will produce additional issue:
By clicking on the Issue we can observe Threads, Registers & Locals, Globals & Statics ISR Analysis and MPU, all of which are useful when debugging.

Conclusion
Integrating Memfault into your embedded system can be a
straightforward process, as we have demonstrated. If your system
already uses SWUpdate, many steps can be skipped. The
meta-memfault-example is a useful resource to start with.
Many of the examples can be applied to integrate Memfault into an
actual product. Additionally, the inclusion of support for Raspberry
Pi provides insight into the requirements for running Memfault on an
embedded device.
We, here at Norik Systems, are pleased to report that all Memfault features worked flawlessly during our experimentation. Therefore, we recommend giving Memfault a try if you are seeking a remote administration platform for your embedded fleet.